Basic Paper Quilling Shapes Every Beginner Should Know
If you've ever admired those delicate, swirling paper designs on greeting cards, wall art, or jewelry and wondered how they're made, the answer lies in a handful of simple shapes. Paper quilling might look intricate, but nearly every stunning design you see is built from just a few basic coils and curls. Once you learn these foundational shapes, you'll have the building blocks to create flowers, animals, mandalas, and so much more. Let's roll up our sleeves (and some paper strips) and explore the essential shapes every quiller needs to know.
What Is Paper Quilling, Exactly?
Paper quilling, also called paper filigree, is the art of rolling thin strips of paper into coils and pinching or shaping them to form decorative designs. The technique dates back centuries and has seen a huge modern revival thanks to its affordability, portability, and meditative, low-stress nature. All you really need to get started is quilling paper strips, a quilling tool (or a toothpick in a pinch), glue, and a little patience.
Before diving into complex projects, it's important to master the basic shapes. Think of them as the "alphabet" of quilling—once you know them, you can combine and modify them to "spell out" any design you can imagine.
Essential Tools for Shaping
- Slotted or needle quilling tool: Used to roll paper strips into tight, even coils.
- Quilling paper strips: Precut strips, usually 1/8" to 1/4" wide, in various colors.
- Glue: A quick-drying craft glue or PVA glue to seal coils and secure shapes.
- Circle sizing board: Helps keep your coils uniform in size.
- Tweezers: Great for pinching precise points and placing tiny shapes.
The Foundational Shape: The Tight Coil
Every quilling shape starts with a coil, and the tight coil is the simplest of all. To make one, roll a strip of paper tightly around your quilling tool from end to end, then glue down the tail without letting it relax. The result is a small, dense circle that's perfect for centers of flowers, eyes on animals, or dots in a design.
Tips for a Perfect Tight Coil
- Keep even tension as you roll—too loose and it won't stay tight; too tight and the paper may crease.
- Apply glue only to the very end of the strip, and hold it in place for a few seconds.
- Practice rolling with both a slotted tool and a needle tool to see which gives you smoother results (needle tools tend to leave less of a crease mark in the center).
The Loose Coil
The loose coil is simply a tight coil that's allowed to unwind slightly before gluing. Roll your strip, then gently release it and let it expand to a larger, airy circle before securing the end with glue. Loose coils are the base for many other shapes, including teardrops and petals, so getting comfortable with this one is key.
Tips for Consistent Loose Coils
- Use a sizing board with graduated circles to make sure all your loose coils match in diameter.
- Let the coil relax naturally rather than forcing it open—this keeps the spiral even.
- Glue the tail flush against the outer ring so it blends in seamlessly.
Shaping From the Loose Coil
Once you've mastered the loose coil, you can pinch and manipulate it into a whole family of classic quilling shapes. These are the true workhorses of paper quilling design.
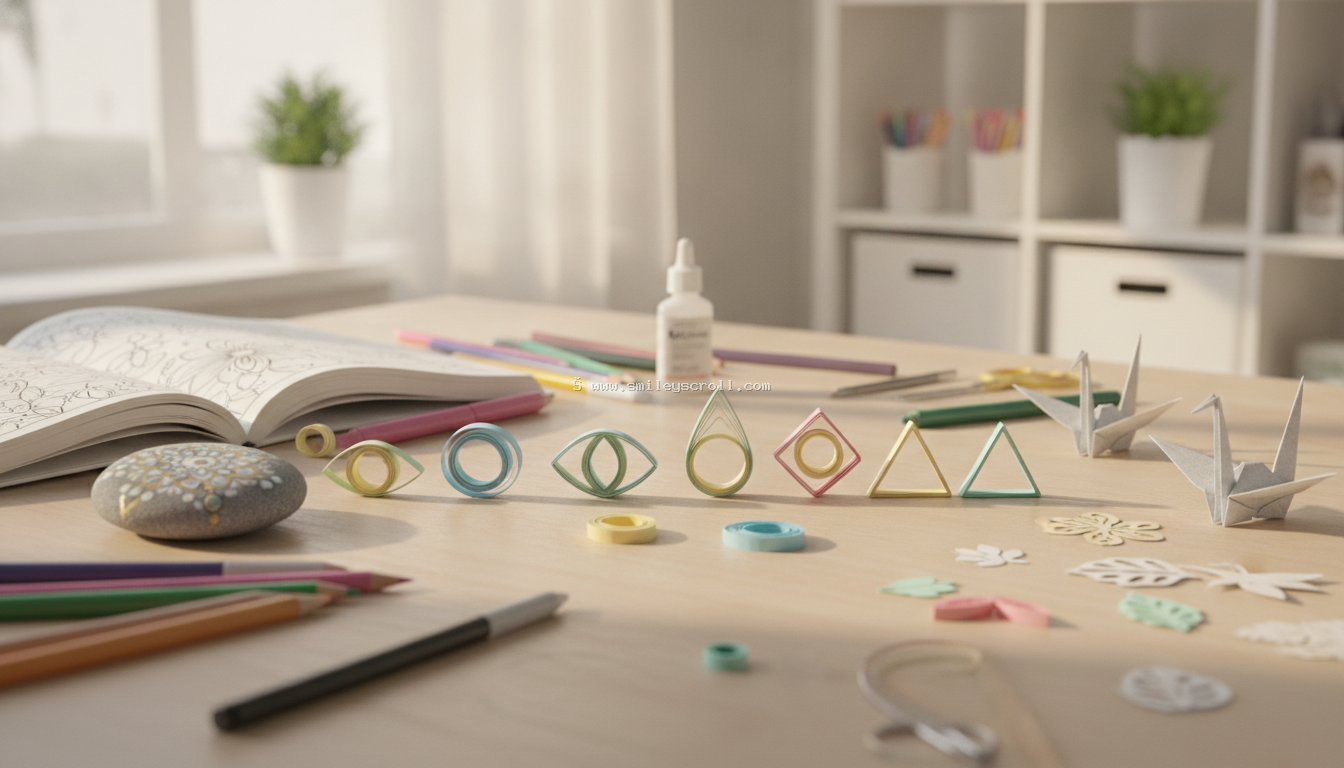
Teardrop Shape
Pinch one side of a loose coil into a point while keeping the opposite side rounded. This creates a teardrop, ideal for flower petals, leaves, and raindrop motifs.
Marquise (Eye) Shape
Pinch both ends of a loose coil into points at the same time, creating an eye-like shape. Marquises are wonderful for petals, wings, and decorative borders.
Square Shape
Pinch a loose coil into four evenly spaced points to form a square. This shape adds structure and geometric interest to your designs.
Triangle Shape
Pinch three evenly spaced points into a loose coil to create a triangle. Great for leaves, banners, or simple geometric patterns.
Heart Shape
Fold a strip of paper in half to create a crease, then roll each half inward toward the center fold, leaving a small V at the top. This produces a classic heart shape without starting from a coil at all—perfect for Valentine's Day cards and love-themed art.
Crescent (Half-Moon) Shape
Fold your strip in half, then curl both ends outward in the same direction using your fingers or the quilling tool, without gluing them into a coil. This creates a curved crescent perfect for wings, moons, or flower petals with a delicate, open feel.
Free-Form Scrolls and Curls
Not every quilling shape starts as a coil. Scrolls are made by simply rolling one or both ends of a paper strip toward the center without gluing them shut, leaving open spirals. A single scroll (rolled on one end) and an S-scroll or C-scroll (rolled on both ends in opposite directions) are staples for adding movement and flourish to borders, vines, and abstract designs.
Practical Tips for Mastering Basic Shapes
- Start with wider, sturdier paper strips (about 1/4 inch) while you're learning—they're easier to control than thin strips.
- Keep your workspace calm and steady. Quilling rewards patience, so avoid rushing your pinches and folds.
- Practice consistent pressure when pinching points, so your shapes look uniform across a project.
- Use a slightly damp fingertip if the paper feels too slippery to grip while shaping.
- Save your "failed" coils. Oddly shaped coils often work perfectly as leaves, filler shapes, or abstract accents.
- Glue sparingly. A toothpick or fine-tip glue applicator prevents messy excess glue that can warp your paper.
Combining Shapes to Build Designs
Once you're comfortable with tight coils, loose coils, teardrops, marquises, squares, triangles, hearts, crescents, and scrolls, you'll start noticing that almost every quilled flower, animal, or pattern is just a clever arrangement of these basics. A sunflower might combine teardrop petals with a tight coil center. A butterfly could use marquise shapes for wings and a crescent for antennae. Understanding the "why" behind each shape helps you improvise your own designs instead of just following patterns.
Conclusion
Mastering the basic shapes of paper quilling is like learning your ABCs before writing a story—it takes a little repetition, but it opens the door to endless creative possibilities. Grab a few strips of colorful paper, practice your coils, teardrops, and scrolls, and before long you'll be designing your own quilled masterpieces with confidence. Happy quilling!